Attention: Please check our FAQs below before contacting us.
Lets get started, some simple steps to follow.
1. Login to the stream portal. Select the admin link Analysis, then select Team tab.
2. Get the Team list from the SFA Comet sysatem. This is crucial to get the list in the correct format. The next fixture will be set. set the Short Team Names, copy and past the Team List sections into the Team and Subs section, ensuring there are no extra lines after the team list (there will be 11 lines only). Press Save.
3. Setup a vmix Frame for a Red/Yellow card. Use the Title 10- Dyno frame. Once the frame has been added, right-click and select Data Source. Manage, +, Excel/CSV, Name : RedYellow, URL: https://parstv.co.uk/analysis/parstv_redyellow2.txt, tick use firstrow as column names then OK.
4. On the Data Source form, slect the Data Source and select RedYellow from th elist.tick Apply to all fields in this Title then OK
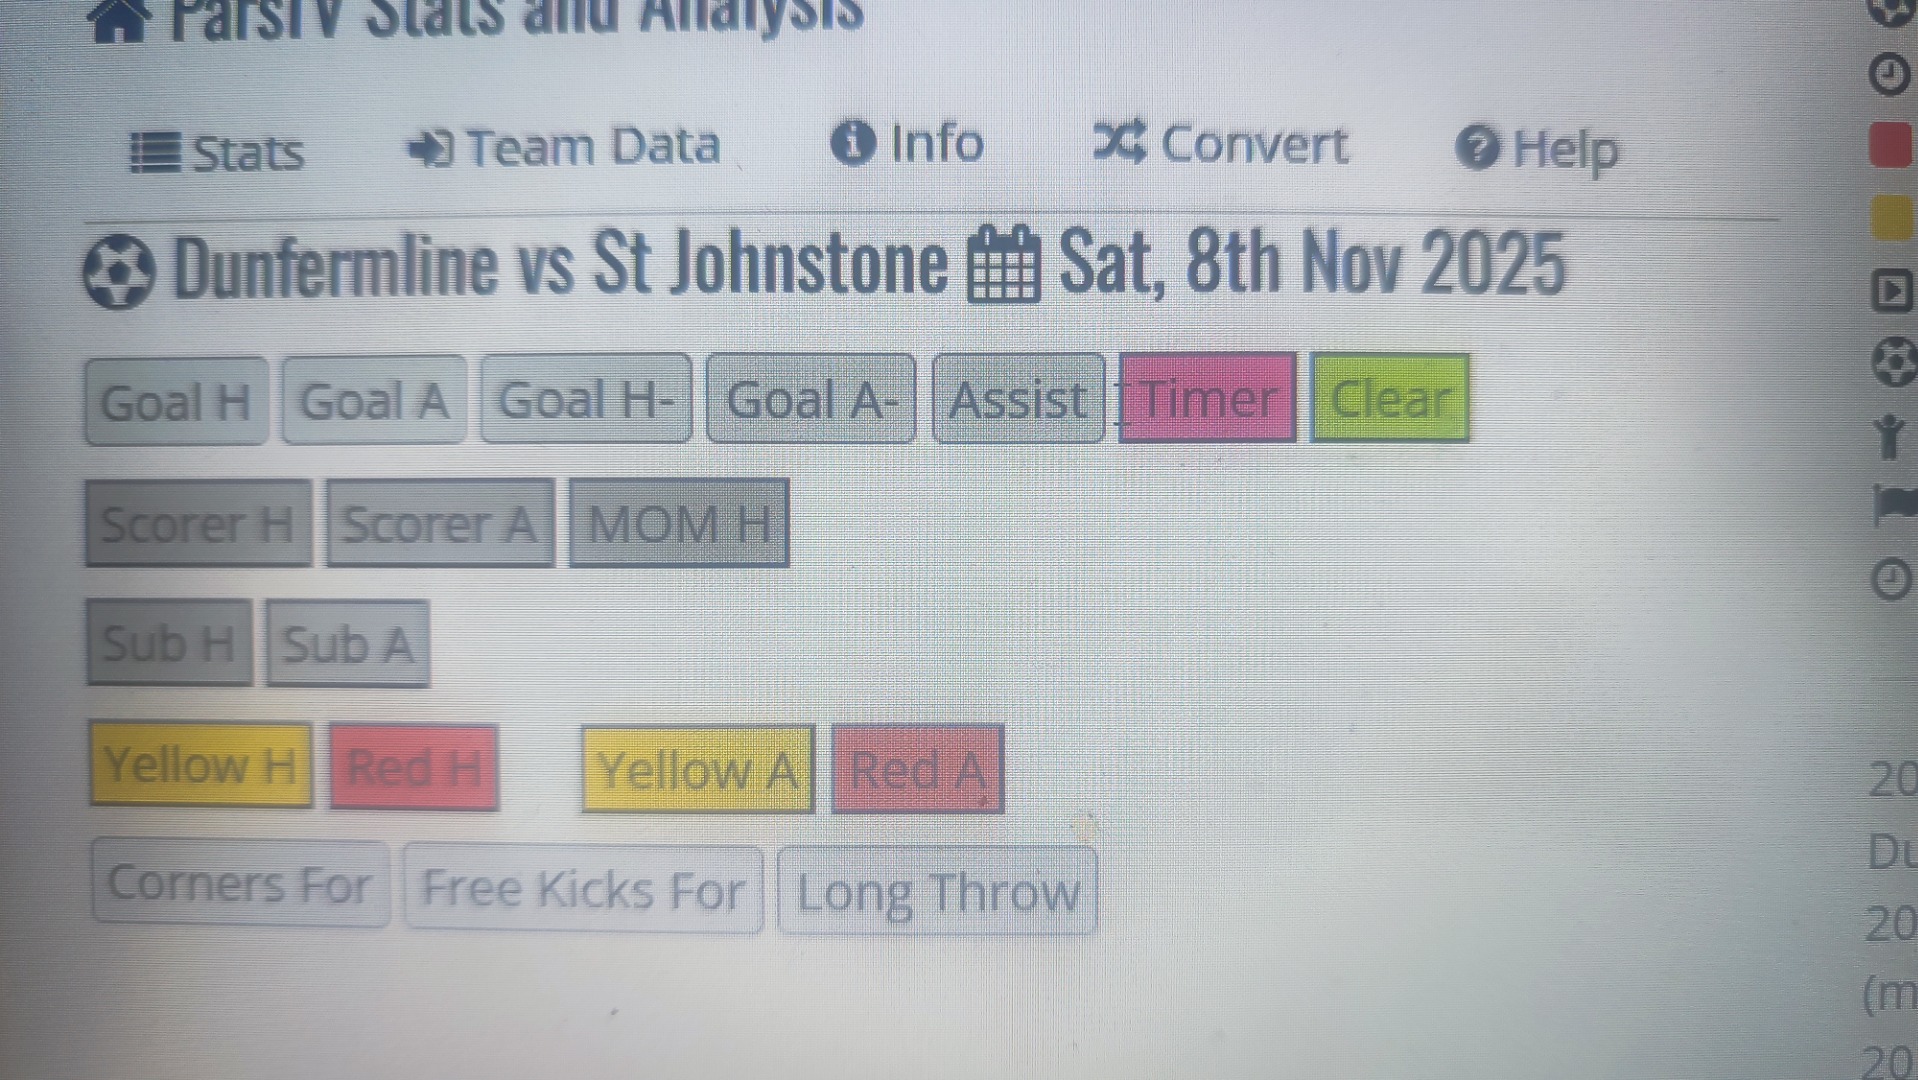
5.You will now see the frame. goto to the Stats form where you see the list of buttons.
you can now select
-- Yellow H, Red H, Yellow A, Red A.
choose one and then select a player from the list and Save. The data will then automatically appear in the Title RedYellow. this can then be overlayed on the output stream.
A sample set of Stream Deck buttons to tie in with new Titles:
![[TITLE]](https://scottishfootball.online/files/IMG_20251121_154812_9055.jpg)
Use the Analysis module to produce the data which will be used for the Overlays (no Vmix or OBS required)
Configure RTMP feed in JVC Camera, other cameras will be similar. NOTE you can also take the HDMI out and feed into a Zowietek Video encoder which has LAN and WiFi connectivity, sdetup the RTMP parameters inside this device.
1. Enter the menu and navigate to System>Network and set it to ON
2. Ensure a supported USB-to-ethernet adapter is connected to the camera and the camera is connected to a network.
3. Go to Connection Setup > Wizard. Available adapter should list “Ethernet.†Choose Next.
4. IP Address Configuration can be set as either DHCP or Manual, but recommend DHCP in most cases.
5. Set FTP Proxy to No Proxy and choose Apply.
6. While still in the menu, navigate down to Network>Settings>Live Streaming Set>Server and choose an available server from the list (Server1, Server2, Server3, Server4).
7. Set Type to RTMP.
8. Set the Destination URL.
9. Set the stream name to “jvc†minus the quotes, case sensitive. You can set the stream name to whatever you choose, just be certain that the final segment of the of RTMP address in matches exactly.
10. Set resolution to an appropriate dimension. There are limitations to simultaneous recording and streaming. (Consult chart below before setting stream resolution.)
11. Set the Frame & Bit Rate to 60i (3.0M). Some locations may work with 60i (5.0M), but confirm via capture/streamthough to channel.
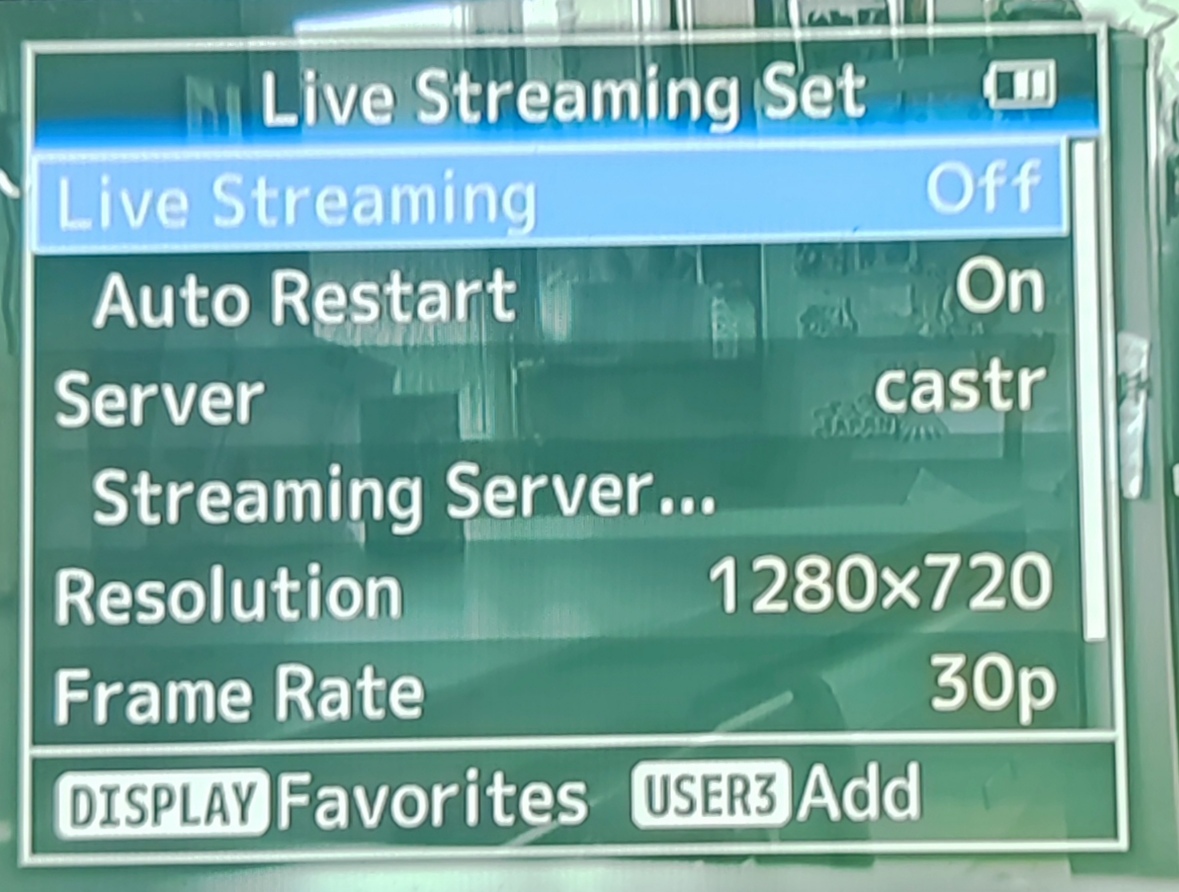
12. Set Live Streaming On.
Image Live Streaming menu on camera LCD
The Analysis Feature is aimed at helping track the stats of a match as well as provide dynamic update for stream information.
This is a simple mechanism to monitor and track events during the match. Initially we are updating Goals, Teams and Susbtitutes for integration into Vmix. Other integrations will follow.
Further information and a sample video can be found on this link Stream direct from Camera
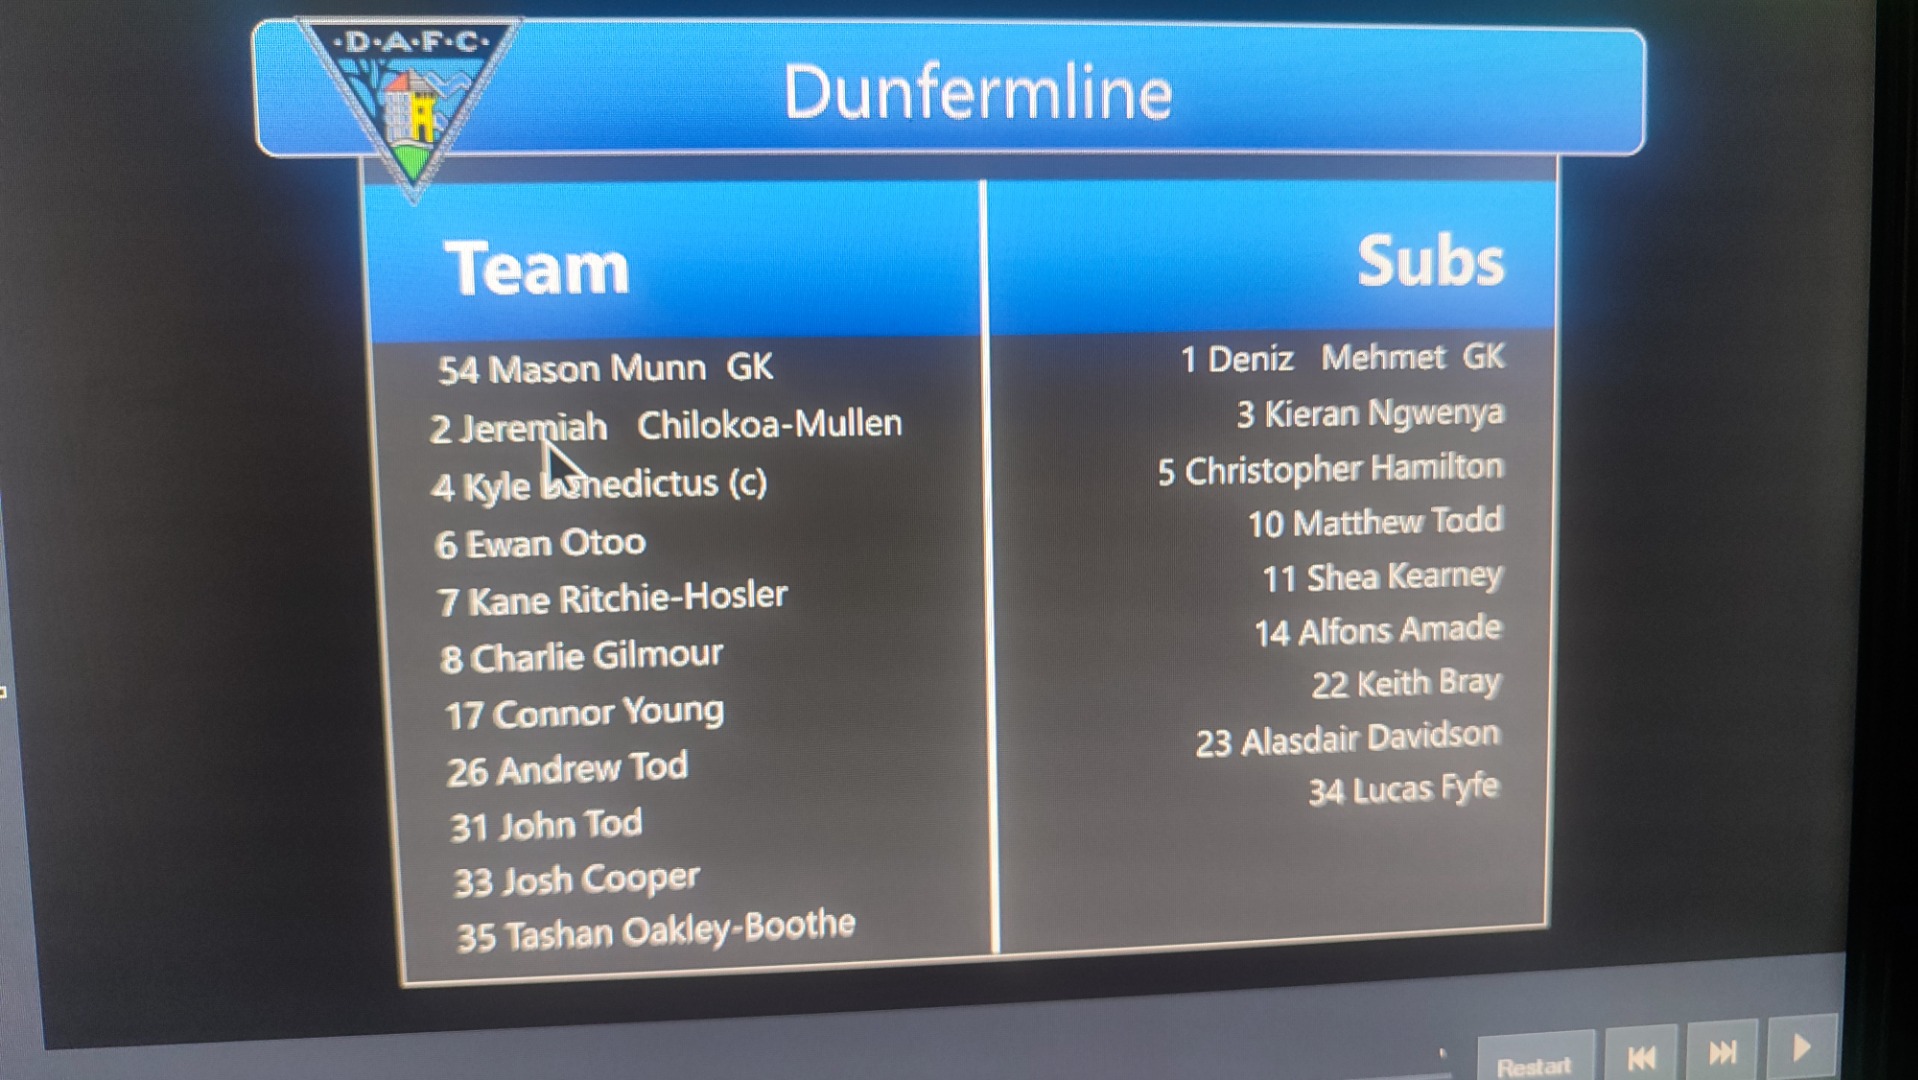
We have supplied a modified Team list frame modified from the original with a Graphic image of the Team.
The image below shows the sample output.
Download the Vmix Title frame here. This uses the home.txt and away.txt files indicated below. Use the Data Source in the frame to setup the team list and will automatically include a team Image. If a team image is missing then let us know and we will upload. The Teams are copied from the Comet Team list system and added into the Analysis module.
The following files are produced to allow immediate update within Vmix.
Each link requires the Club Website followed by the data, for example:
https://ParsTV.co.uk/analysis/parstv_home.txt
-- /analysis/REF_home.txt : Home Team List and Substitutes
-- /analysis/REF_away.txt : Away Team List and Substitutes
-- /analysis/REF_teams.txt : Home Team and Away Team list (two above are preferred)
-- /analysis/REF_subs.txt : The Home Substittues and Away Substitutes
-- /analysis/REF_scoreboard.txt : Vmix SPFL scoreboard updates H and A name and scores
-- /analysis/REF_banner.txt : Vmix Main title screen with information.
-- /analysis/REF_banner2.txt : Vmix Main title different colours.
-- /analysis/REF_banner_black.txt : Vmix black and white (format) e.g used for commentary info.
-- /analysis/REF_banner_redyellow.txt : Vmix red or yellow card, Player name and Club
Thes files can be viewed using a web browser, a handy way to verify the details.
Within Vmix the following steps can be used to setup access for the remote data.
1. Add the appropriate Title Frame, such as Team Lineups
2. Select Data Source
3. On first entry, Data Source popup shows None.
4. Select Manage
5. Select + at top left to add item, select Excel/CSV
6. Name type HOME
7. enter url, e.g. : https://ParsTV.co.uk/analysis/parstv_home.txt
8. tick/select Use first row as column names then OK (should show some lineup data)
9. Select + at top left to add another item, select Excel/CSV
10. Name type AWAY
11. enter url, e.g. : https://ParsTV.co.uk/analysis/parstv_away.txt
12. tick/select Use first row as column names then OK (should show some lineup data)
13. close that window to return to the Data Sources selection.
14. at Data Source select HOME or AWAY from popup
15. Then select/Tick "Apply to all Fileds in Title" Then OK
At this point the team List frame will automatically pull in data from the Analysis feature.
NOTE: ensure that for Home Team and Away team place a "," between each player and ensure only 11 players in list.
For the Subs, you can put a list of up to 11 players names.
-- banner.txt Title 1-Element Blue
-- banner2.txt Title 74-Billion Reasons
-- banner_black.txt Title 20-Stripey
-- banner_redyellow.txt Title 10 DynoLong
We can import images into Vmix using an Image Title. in this case we have setup "Stinger1- LineyGrey Grey" Title with Data Source using one of these:
-- https://ParsTV.co.uk/analysis/parstv_image1.txt
-- https://ParsTV.co.uk/analysis/parstv_image2.txt
-- https://ParsTV.co.uk/analysis/parstv_image3.txt
You can setup 3 extra frames in Vmix, setup the image locations from your website and then overlay them into your production as you require. You may likely need to crop the stinger Title to show only the image and not the background.
The following features are available:
Data is setup including timings in minutes for the data that can be imported into Vmix Data Sources frames. Contact us for more information.
More information to follow for the Goals and timing etc.